If you are new to this blog, it probably would be to your benefit to start at the bottom post and work your way up. This blog is sponsored by weshoot.com, where you may see many examples of architectural photos, and bilbord.com, where you can see extensive retouching and enhancement of building images. Its purpose is to give anyone who wishes to photograph building interiors and exteriors the knowledge of how to do so correctly, and what to do in post-production work to make their images better and more professional-looking. I will periodically be adding to this blog. Please note that I do not allow blogspamming in comments, and any attempt to do so will wind up with the comment being removed.
Saturday, September 02, 2006

Is it possible to take architectural photos with a low-priced camera?
My answer is an emphatic Yes! Especially if you have an exterior image to do. Interior images sometimes call for lighting, placement of elements within the image, and exposure requirements from mixed lighting. For exterior images, the sunlight should ideally come from behind the photographer, even on an overcast day. It avoids cloudiness in the image from halation and flaring if the light is behind you. So waiting for the ideal time of day is important. For architectural images, the camera lens has to be parallel to subject so the uprights do not "keystone," or recede into the distance. Sometimes, you will note that this is hard to do, as the structure will sometimes be on the top of the image, with a lot of ground in front, i.e. parking lot, lawn, etc. So, many photographers turn the lens upward to get rid of the overabundance of ground, and instead, get the dreaded keystoning, especially more pronounced with wide-angle lenses. That is why architectural photographers used those cameras with the bellows. This type of camera, often called a view camera allowed the photographer to bend the image in the camera to the point that the uprights became straight again. It was also possible to adjust the side-to-side keystoning that occurred.
So, how do you correct this distortion with a low-priced digital camera? One way is to shoot with your camera as parallel to the subject as possible. If placement of that object in the photograph is not where you want it, and you have to tip the camera upward, Photoshop, or another editing program can come to the rescue. In Photoshop, simply make a duplicate layer of your image from the layers palette, and go to Edit>Transform>Distort, and play with it until it looks straight.
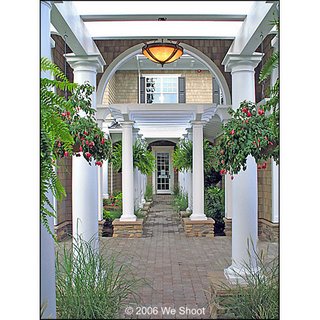
The image at the top of this post is an example. It was shot with our A620 Canon 7.1 megapixel camera, and slightly tweaked in Photoshop CS2. You can see this camera on my blog at http://buyandsavealot.blogspot.com/2006/08/using-your-computer-and-internet-to.html to give you an idea. We purchased this camera for $217.83. Not expensive at all.